Theme images by Storman. Powered by Blogger.

Featured Posts

Sunday 5 April 2015

How To Download Full Backup Of Blogger Blog Posts

- No comments
How_to_download_full_backup_of_blogger_blog_posts
Download Full Backup Of Blogger Blog Posts
Namaste :) In this post I'll explain How you can download full backup of your blogger blog. Nowadays every newbie have their own blog. The main purpose to create a blog on blogger.com is to make money with Google AdSense. Because Google AdSense is best choice to show genuine ads on your blogger and make money with it. Read this post 'Approve AdSense In A Minute On Your Blog' to successfully get approved by Google AdSense in very first attempt. Come on the topic, Backup is very important because sometimes your blogger blog gets deleted.  May be it's because your blog is avoiding TOS of Blogger or may be you deleted it by mistake. So in case you loose your all posts of blogger blog. But if you have backup of your blogger blog then you need not to worry you can easily get your all valuable posts. Just upload that backup and you are done! 

So lets start, follow the below mentioned steps accurately to download full backup of your blogger blog - 


How to download full backup of blogger blog ? 


Step 1. First of all login to your blogger dashboard and choose the blog which you want to take backup of. 

Step 2. Then go to > Settings > Other  Here is an option 'Blog Tools' 

Step 3. Click on 'Export blog' and then a pop-up will open. 
backup_all_posts_of_blogger_blog_in_a_minute
Click on Export blog


Step 4. Now click on 'Download Blog' and backup of your blog will start downloading. 

backup_blogger_blog_full_tutorial_easy_way
Download Blog
  
That's it! Now you have full backup of your blogger blog to use in bad situation. To use that backup you have to upload that backup file to the new blog. To do so follow the below instructions. 

How to upload full backup of your blogger blog to another blog ? 


Step 1. Sign in to your blogger blog and open dashboard of your new blog. 

Step 2. Now go to Settings > Other > Blog Tools 

Step 3. Now here you will see three options Import blog - Export blog - Delete blog. 

Step 4. You have to choose 'Import blog' option and a pop-up box will open. 
how_upload_backup_of_blogger_blgo_to_another_blog
Import Blog


Step 5. Now choose your backup file by clicking on 'Browse' button. 

Step 6. Then click on 'Import Blog' button to start uploading your blog backup.
copy_all_posts_of_old_blogger_blog_to_another_blog
Upload Blog


You have done! Now wait a few minutes till backup file successfully uploaded. After that your all posts of old blog will be published automatically on your new blogger blog. :) 

 So enjoy your new blog with all your old posts and pages. :) 

How to backup all posts and pages of Blogger Blog Full Tutorial 


If you liked this post then please share it with your friends on Facebook and other social sites because 'Sharing is Caring' :) 

Keep visiting for more such tutorials and tricks. ;) 

Have any query or questions regarding this post ? Don't hesitate to ask in comments below. 

Share+Like+Comment - Thank You! :)

Saturday 4 April 2015

Free Calling Android App Without Internet Connection 2015

- No comments
free-calling-android-app-latest-working
Hullo Free Calling Android App
Namaste! :) In this post I am gonna share an awesome android app to call anywhere, anytime for free without Internet Connection. Yes! you heard right now you can call anywhere without paying a single penny even without internet connection. :) Nowadays everyone wants a solution to reduce calling bills. So after reading this post you won't need to waste your hard earned money on calling bills. This is just a simple app that offers free calls worldwide without internet connection. So by using this android app you can call to anyone without internet for free
This app is called Hullo. Hullo is an android app that gives you freedom of calling anywhere, anytime for free.  So lets start without wasting priceless time.

What is Hullo ?

  • Hullo is your awesome new free calling app that doesn't need Internet data. 

free_calling_app_free_unlimited_calls_anytime_without_internet
Free Call Without Internet Data

Features of Hullo Free-Calling App - 


  • Hullo is free android app
  • Easy to use
  • No Internet data required
  • Free calling anywhere, anytime 
  • Small in size


How to use Hullo free-calling Android app ? 

  1. Download Hullo app from given link 
  2. Install Hullo free-calling app
  3. Connect with Facebook 
  4. Tap on a contact to call them for free. :)

Now you need not to worry about phone bills. No more worrying about balance. No more missed calls. No limits on talk time or number of calls made. Use Hullo free-calling app and enjoy unlimited free calls from your android device/smartphone even without wasting your internet data. :)

Download Hullo Free-Calling Android App For Free - 


Hullo Free Calling App


Latest Post - Hack Wi-Fi Password In Android Phone

Frequently asked question about Hullo free-calling app -
 

Q. Do I need internet to make the call?
A. Only to request the call. You do not require your internet data for the call.
 
Q. I just got a message saying you are offline
A. That is because the friend who tried to call you did not have mobile internet switched on while calling you.

Q. Does my friend need internet to recieve a call?
A. No they do not, as the phone calls are not over the internet.

Q. Where do I report issues?
A. You can message us on hullo@gethullo.com or on our facebook page.

Q. Are SMS’s free too?
A. No, only calls are free.

Q. What if I am on windows or iOS?
A. The hullo app for Windows and iOS are to be released shortly.

Q. Is this anywhere in the world?
A. As of now this is just for calls in India.


If you liked this post please share it with your friends on Facebook and other social sites because 'Sharing is Caring' :) 

Keep visiting for more such tricks and tutorials. 

If you have any query or questions regarding this post, don't hesitate to ask in comments below. 

Share+Like+Comments - Thank You!

Paytm Loot - Give Missed Call & Get Rs. 15 Paytm Cash [Latest]

- No comments
paytm-loot-give-missed-call-and-get-rs-15-paytm-cash

Loot-Give Missed Call & Get Rs. 15 Paytm Cash


Paytm Wallet Offer - Paytm is heading towards heights for becoming the best online recharge site and online shopping site with its offers and discount rated deals. Paytm is known for Online recharge of Mobile, DTH and Datacard and moreover you can make bill payments and recharge online for Airtel, Vodafone, Aircel, Idea, Docomo, BSNL, MTNL and more. Online Shopping has seen an exponential growth in the recent years. Realizing the benefits of it, Paytm has entered the world of online shopping with top brands across all verticals. You can literally buy anything in the wonderland of Paytm. There was a time when we used to go to a retail store to buy a particular product available with limited options. Breaking this barrier, Paytm can be used anytime anywhere within the comfort of your home or office.


In this post I am sharing an amazing promotional offer by Paytm for there new users. New users will get free Rs 15 to there Paytm wallet cash just by giving a missed call to a number. So you don't required any Paytm coupons or Paytm promo code for this. All you need to do is a free call to get free Paytm wallet balance.

Steps To Get Free Paytm Wallet Cash-

  • Give a missed call to this number -


    01204956301

Note: You will not be charged anything for this, the call will disconnect on ringing automatically.
 

  • Let the phone disconnect automatically.
  • After call gets disconnected you will get a text message from Paytm for confirmation of free Rs. 15 wallet cash.

Terms & Conditions:
1. Clicking on the above button you are agreeing for creation of your Paytm semi-closed wallet. Read T&C before clicking.
2. This offer is only for new Paytm Users.
3. Rs.15/- will be credited as Paytm Cash in your wallet once you set the password for your account through the sms you receive after the call.
4. Paytm cash can be used for Mobile Recharge/ DTH/ Shopping, yay!

If you liked this post please be kind and share it with your friends on Facebook and other social sites because 'Sharing is Caring' :)


If you have any problem/issue regarding this post don't hesitate to ask in comments below. 


Share+Comments+Like-Thank You! :)

Saturday 28 March 2015

Fileice Survey Bypass/Complete In A Minute Latest [Working] 2015

- No comments
fileice_survey_bypass_complete_in_a_minute_latest_working_2015
Bypass Fileice Survey In A Minute
Namaste :) In this post we are back with a awesome tutorial 'How to complete/bypass Fileice Survey'. Yes! Now you can complete or bypass fileice survey by your own, you don't need any software or bypass tool. As we all know that all the tools and software those offers to get direct link of Fileice files are fake and not working. So today I'll guide you to complete fileice survey to get your desired file instantly. 

There are lot of website which are posting Fileice survey completion guide. But most of them are fake and doesn't providing real and working method to bypass fileice surveys. Don't worry in this post I'll teach you step-by-step 'How you can complete Fileice Survey in a minute'. 

By this trick you can bypass any survey. This method is also works on Cleanfiles, Sharecash etc. So read full post and be prepared to bypass any kind of Survey by itself. After reading this post you won't need to ask or beg anyone to bypass your survey link.


How To Bypass Filiece, Sharecash and Cleanfiles Survey - 


Step 1. First of all you must have a VPN or Good Proxy of US.

Step 2. Now connect VPN with US server and check your ip location from Here!

Step 3. Then open Fileice Link in Internet Explorer or Google Chrome.

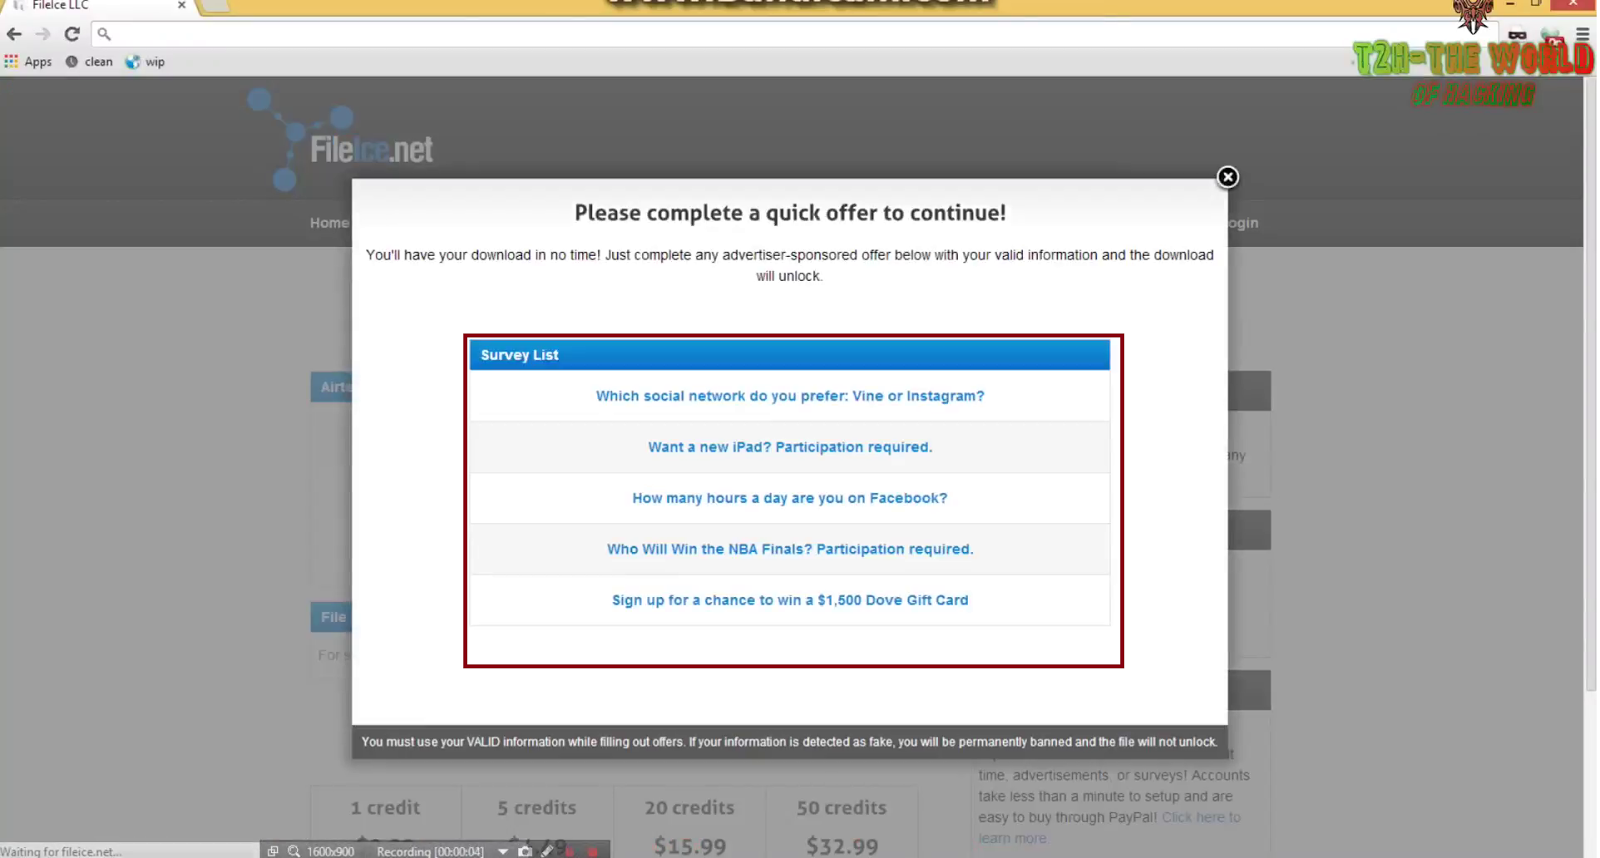
Step 4. Now click on 'Regular Download' and select any survey, a new tab will open. 

how_to_complete_fileice_survey


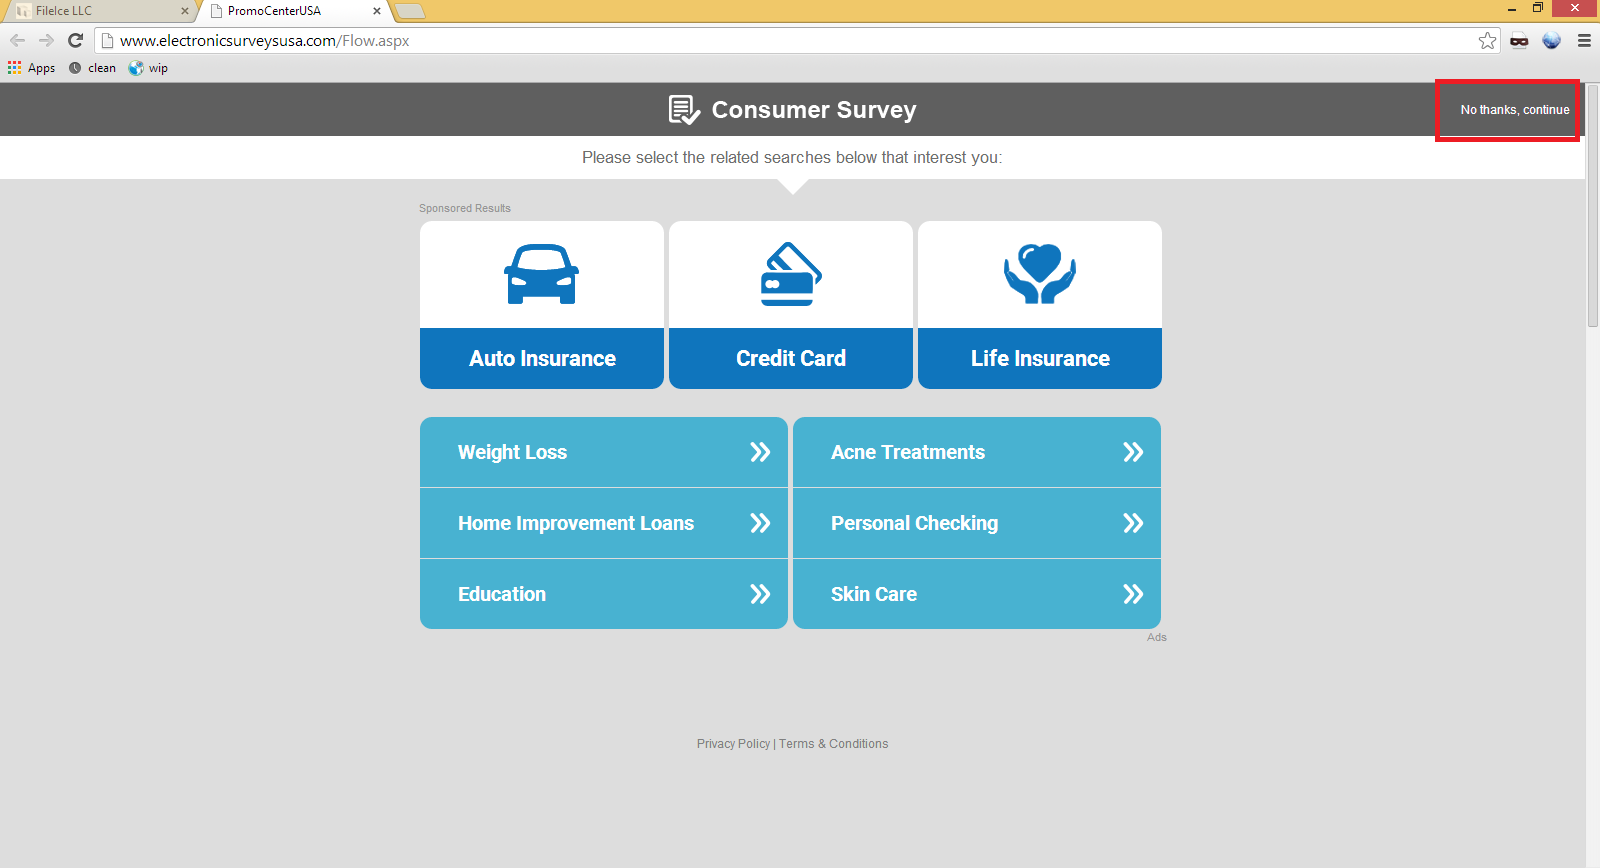
Step 5. Now Click on 'No thanks continue' in top right corner and then answer some useless questions. :P 
fileice_survey_bypass_trick_latest_2015

Step 6. Here fill fake info ex: Fake Name, Fake Email etc. 
bypass_fileice_survey_easily_full_guide


Step 7. Click Continue and then fill fake mobile no. , Age etc. 
fileice_survey_unlock_in_a_minute


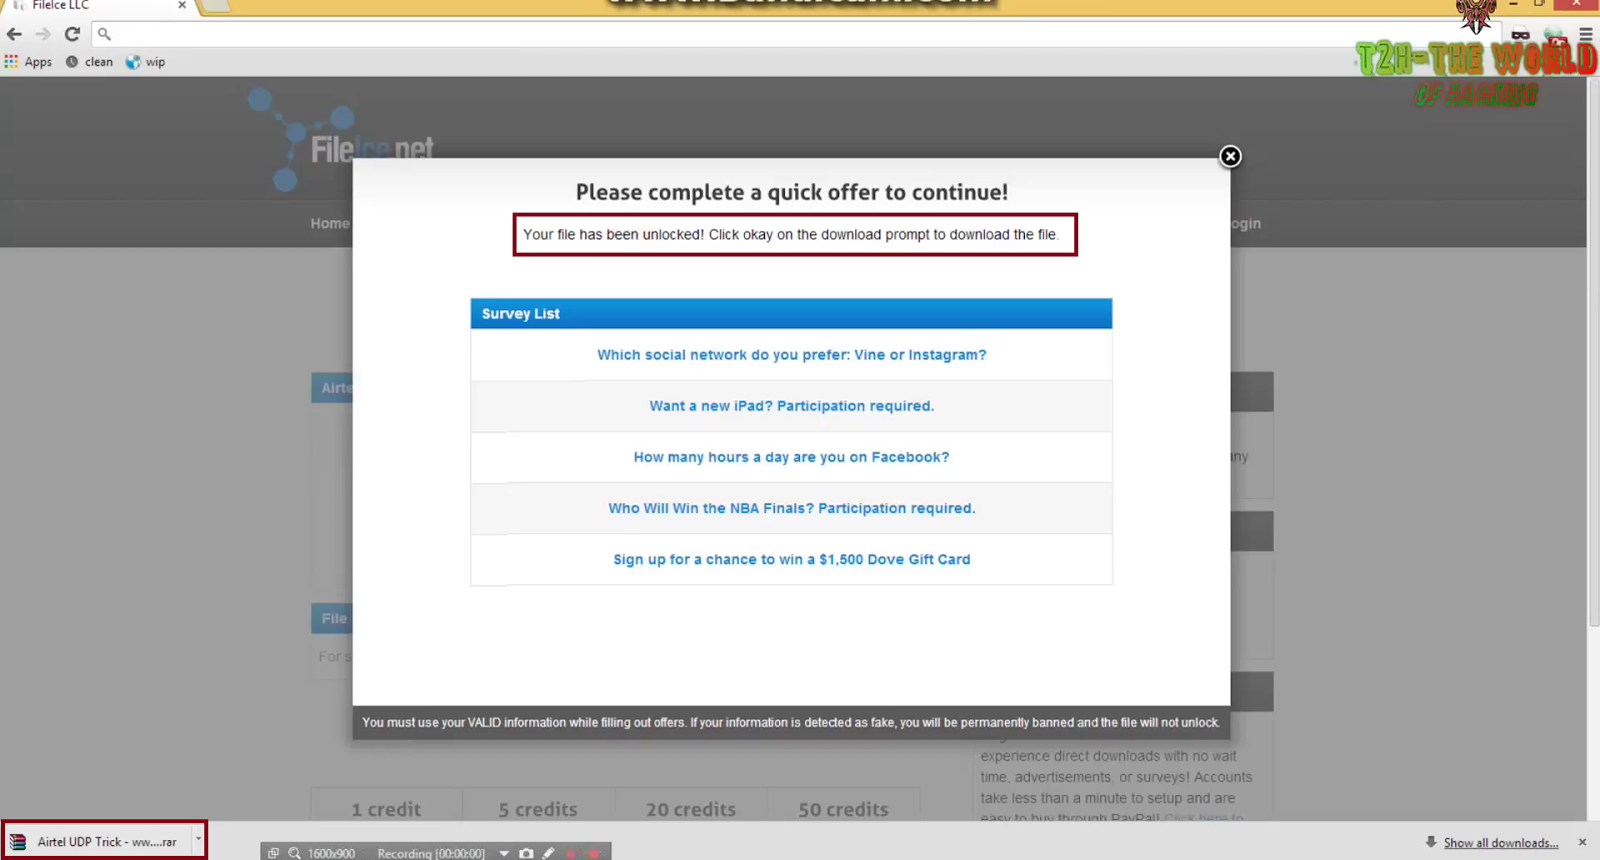
Step 8. Now click on Continue. And that's it now your file will start downloading. 
how_to_bypass_fileice_sharecash_cleanfiles_survey_in_a_minute


How To Bypass Filecie Survey In A Minute Full Video Working


Note:- If the file not unlocks after 1st attempt then choose another survey and do the same. You will surely get your file unlocked. :) 


Download Unlimited UDP VPN 


Unlimited UDP VPN Free


If you have any query or questions regarding this post then don't hesitate to ask in comments. We are always happy to help others.


If you liked this post then please share this post with your friends on Facebook and other social sites because 'Sharing is Caring' :)


Share+Like+Comments - Thank You! :)


Friday 27 March 2015

WIBR Plus Wifi BRuteforce Hack Pro Apk 1.0.3 Full Android 2015

- No comments
hack_wifi_password_in_android_smartphone
How To Crack Wi-Fi Password In Phone
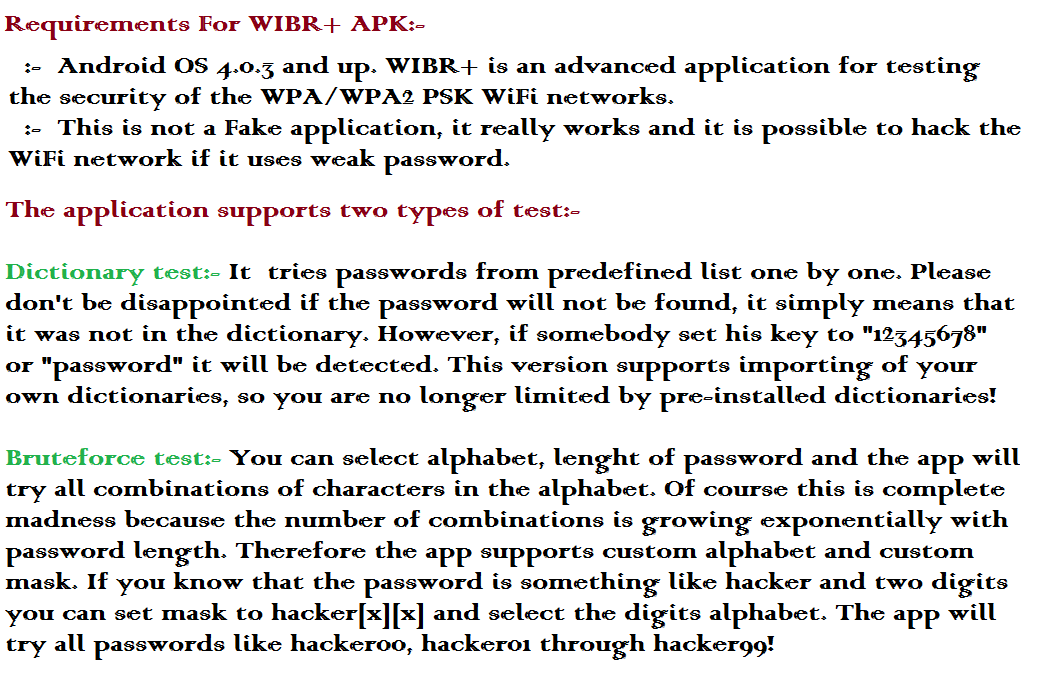
Namaste :) In this post I will explain how to hack/crack Wi-Fi password in your Android device/smartphone by using Wibr Plus Pro APK. Yes you can crack wifi password in your phone. It's simple and very useful app by which you can easily crack password of any wifi network near you. Wibr Plus is an application specially developed to access Wi-Fi networks which are using WPA/WPA2 PSK encryption. This application is to test the security of your Wi-Fi network. This App isn't fake and it's working perfectly. It is possible to access Wi-Fi network if it uses weak password

Also Read - Approve Google AdSense On Your Blog In A Minute

Description of Wibr Plus Pro APK :- 

wibr_plus_apk_hack_wifi_in_phone
how_to_crack_wifi_password_in_smartphone
Wibr+ Wi-Fi Network Security Test


How to Hack/Crack Wi-Fi Password by Wibr+ -


1. First of all list the available wifi networks and select that you want to crack. Wibr+ is tested on WPA/WPA2 with PSK (Pre-Shared Key). Please note that if signal strength is weak result may unreliable.

2. Now select dictionary that you want. There are 3 predefined wordlist which you can use. These dictionaries contains all commonly used passwords.

3. Wait for the results. It may take looooong time due to device strength. Wibr+ is also Battery eater. ;)


Please Note That Hacking Someone Else's Wi-Fi Network Is Illegal! This Tutorial Is Only For Educational Purpose. Use Only To Test Your Own Wi-Fi Network. We Are Not Responsible For Any Illegal Use Of This Tool. Hope You Understood.


Download Wibr Plus Pro APK 

Download Wibr Plus Pro APK Free 

Password - onlyhax


If you liked this post, please share this post with your friends on Facebook and other social sites because 'Sharing is Caring' :)


Also visit - Unlimited Free Mobile Recharge


If you have any questions regarding this post don't hesitate to ask in comments below.

Keep visiting daily to know more such hacks and tutorials. ;)


Share+Like+Comments-Thank You! :)

Sunday 22 March 2015

Hack Wi-Fi Network Using zANTI In Android Device/Smartphone [Latest]

- No comments
hack_wifi_network_by_using_zanti_in_your_android_device_smartphone
Hack Wi-Fi Network
Namaste :) - In this post I will explain you all 'How to Hack in to any Wi-Fi Network using zANTI Android Application'.

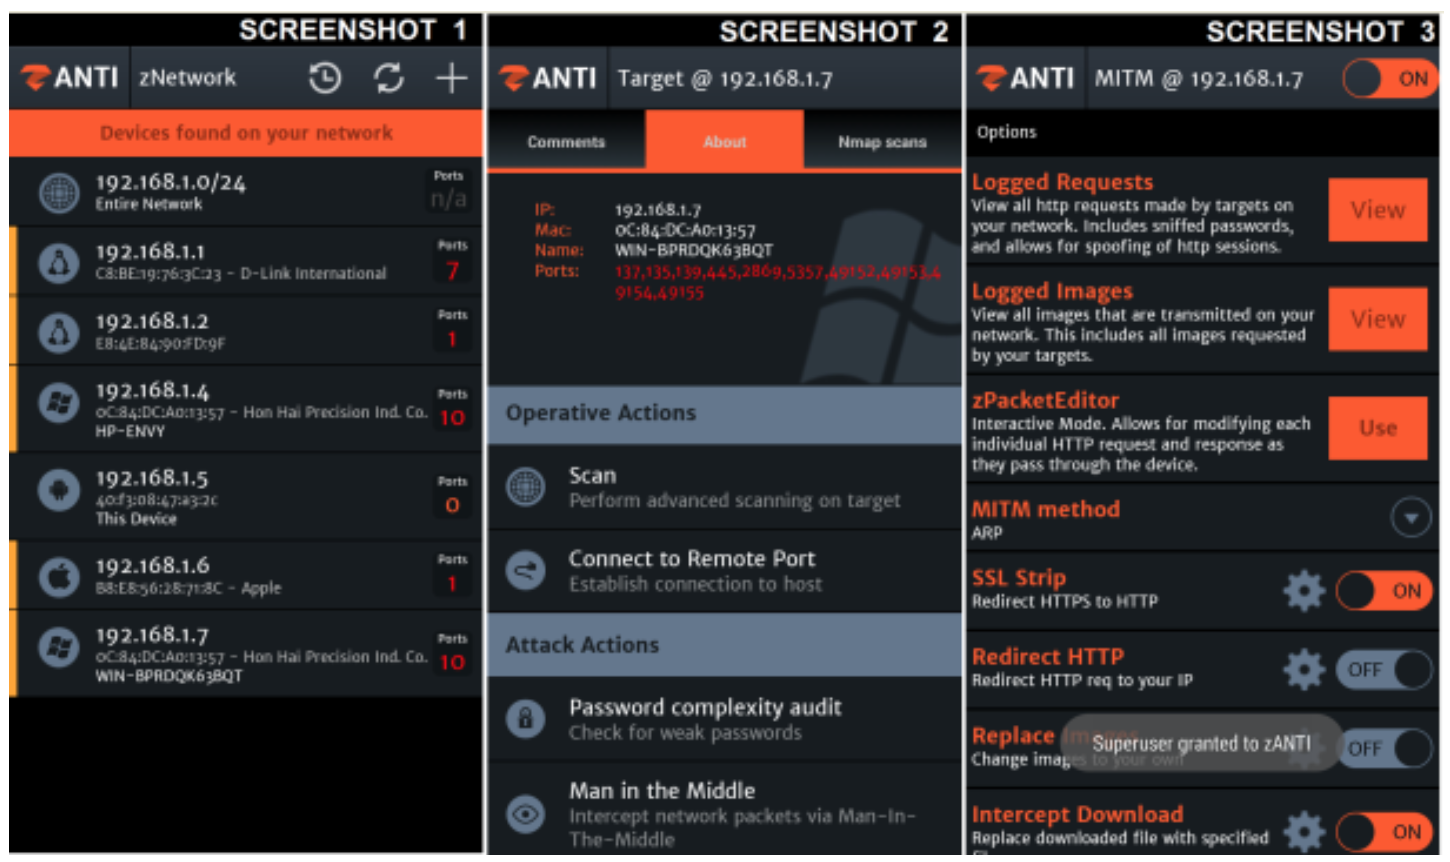
Zanti is an  Android Network Analysis and penetration suite which aims to offer to IT security experts/geeks the most complete and advanced professional toolkit to perform network security assessments on a mobile device. Once dSploit is started, you will be able to easily map your network, fingerprint alive hosts operating systems and running services, search for known vulnerabilities, crack login procedures of many tcp protocols, perform man in the middle (MITM) attacks such as password sniffing ( with common protocols dissection ), real time traffic manipulation etc .


Features Of Zanti Premium APK


WiFi Cracking
The WiFi scanner will show in green access points with known default key generation algorithms, clicking on them allows you to easily crack the key, supported models - Thomson, DLink, Pirelli Discus, Eircom, Verizon FiOS, Alice AGPF, FASTWEB Pirelli and Telsey, Huawei, Wlan_XXXX, Jazztel_XXXX, Wlan_XX, Ono ( P1XXXXXX0000X ), WlanXXXXXX, YacomXXXXXX, WifiXXXXXX, Sky V1, Clubinternet.box v1 and v2, InfostradaWifi.
Trace
Perform a traceroute on target.


zanti_premium_apk_full_tutorial_crack_wi-fi_with_free_tool_in_android
Hack Wi-Fi Network With zANTI


Port Scanner
A syn port scanner to find quickly open ports on a single target.

Inspector
Performs target operating system and services deep detection, slower than syn port scanner but more accurate.

Vulnerability Finder
Search for known vulnerabilities for target running services upon National Vulnerability Database.

Login Cracker
A very fast network login cracker which supports many different services. 

Packet Forger
Craft and send a custom TCP or UDP packet to the target, such as Wake On LAN packets.

MITM(Man-in-the-middle) Attack
A set of man-in-the-middle tools to command & conquer the whole network.

Simple Sniff
Redirect target’s traffic through this device and show some stats while dumping it to a .pcap file.

Password Sniffer
Sniff passwords of many protocols such as http, ftp, imap, imaps, irc, msn, etc from the target.

Session Hijacker
Listen for cookies on the network and hijack sessions.

Kill Connections
Kill connections preventing the target to reach any website or server.

Redirect Traffic
Redirect all the http traffic to another address.

Replace Images
Replace all images on webpages with the specified one.

Replace Videos
Replace all YouTube videos on webpages with the specified one.

Script Injection
Inject a JavaScript in every visited webpage.

Custom Filter
Replace custom text on webpages with the specified one.

How To Hack Wi-Fi Network Using zANTI [dSploit] Full Video


How To Install Zanti Premium APK ?


  1.     Download the APK from below.
  2.     Transfer it to your mobile.
  3.     Install The file.
  4.     Enjoy!!! You Have Zanti APK [dSplit.apk]. One of the best hacking app for android.


Requirements for Zanti


  1.     ARM - Your device must have an ARM cpu.
  2.     Gingerbread - An Android device with at least the 2.3 ( Gingerbread ) version of the OS.
  3.     Root - The device must be rooted.
  4.     BusyBox - The device must have a BusyBox full install, this means with every utility installed ( not the partial installation ).


Download zAnti Premium APK

Download zAnti Premium APk


This tutorial is for educational purpose only. We are not responsible for any illegal use of this tut. Hope you understood. :)


If you liked this post, please share this post with your friends on Facebook and other social sites because 'Sharing is Caring' ;)

Do visit regular for more such tutorials and hacks. :)

Comment+Share+Like=Thank You! :)

Saturday 21 March 2015

Approve Google Adsense In A Minute After Disapproved/Rejected [Full Tutorial] [Latest]

- No comments
AdSense Disapproved/Rejected Fix
Namaste! :) In this post I am back again with the solution of a very common issue 'AdSense Disapproved/Rejected'. It is as 'Google have any personal problem with me, it always disapproves my application'. ;) But it's not like that, Google AdSense only approve those blogs or website which compile with their terms and conditions. But if your blog or website disapproved for AdSense, then this post is for you and its very helpful. 
As I also faced the same problem and I was tired because every time I apply for AdSense, only one email from Google AdSense 'Unfortunately after reviewing your blog/website we are enable to approve your application at this time' :( Isn't it ridicules ? Yes it is. But after so many attempts I got success, finally Google AdSense Approved on my blog/website.
And now I can show ads on my blog without any further issue. And it's ultimate and very simple trick to get Approved for Google AdSense. You can also find many posts and articles on web about 'How to get fully Approved Google AdSense'. But most of them are useless and some are very difficult. 
But after read this post you won't need to find another solution for this issue, because it's confirmed working and tested by me. And by this method you will definitely get Fully Approved AdSense Account for your blog/website. 
So lets start and follow the below steps accurately, if you want to Approve Google AdSense on your blog/website:

Steps to be followed - 
Step 1. First of all create a YouTube Channel and upload some unique videos. [Don't upload someone's else video]
Step 2. Now after that enable Monetization on your YouTube videos. To do so go to My channel > Videos Manager > Channel > Monetization and enable Monetization.
adsense_approval_trick_confirmed_working_2015
google_adsense_disapproved_fix
Enable Monetization on YouTube Channel
 Step 3. Now YouTube will ask you to associate an AdSense account with your YouTube Channel to get revenue. 
Step 4. Then associate AdSense account by following screen instructions. [Go to > Here! and click Next ]
enable_monetization_on_youtube_channel
Associate AdSense Account With YouTube Channel

Step 5. Now after that you will get an email from Google AdSense that 'Your AdSense account is approved to show ads on your YouTube videos' 

Step 6. Now go to your AdSense account make sure that it's fully activated.

Step 7. Then go to your blog dashboard on which you want to apply AdSense and navigate to Settings > Basic > Permissions > Blog Authors, here click on +Add authors and enter that Gmail id on which you got approved AdSense for YouTube and click Invite.


adsense_approve_on_your_blog/website_within_a_minute
Add New Author


Step 8. Then open your AdSense approved email id and you will find an email of invitation to contribute for blog, open it and accept invitation.

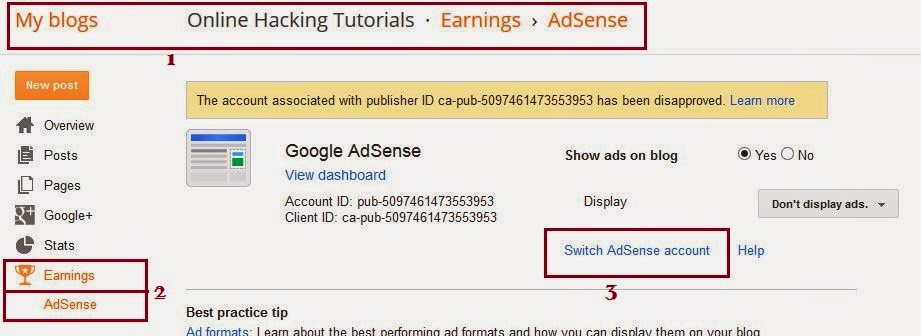
Step 9. Now go to you Blog dashboard > Earnings > Switch account and use your approved email id and click on Continue.


google_adsense_account_approval_trick_working
Switch AdSense Account
Step 10. That's it you will see a message that 'Congratulation! The AdSense widget has been added to your blog template.' Now click on Continue and setup ads on your blog/website. :)


adsense_approved_on_blog/website_in_a_minute
AdSense Approved 
Now you can show ads on your blog/website without any issue. And by using this method you need not to wait a long to get reply from AdSense. So guys I hope you enjoyed this tutorial. :) 
I also created a video of this, by which you can better understand the steps. So watch the full video and enjoy your fully Approved Google AdSense Account :) 

How To Approve Google AdSense On Blog In A Minute [Working]


So if you liked this post, please share this post with your friends on Facebook and other social sites because 'Sharing is Caring' :)


If you have any query or questions regarding this post, then don't hesitate to ask in comments below. We will reply ASAP. :) 


Share+Like+Comments - Thank You! ;)